
You have a private key that will work with this certificate on the instance on which you generated the request (it doesn't show up in CertManager though) - your finished PKCS12 file will contain this key, the issued certificate and the issuing certificate hierarchy) - a correctly configured example will look similar to this when finished:
- Once you have your validated certificate (and normally a collection of Intermediate certificates from your CA) from the certification authority, you can then import each into CertManager. These are sometimes provided as a Zip file, so you may need to unzip those to a suitable location first.
- Import each certificate from your Certification authority:
- Within CertManager (Certificate(Local Computer)/Personal/Certificates) right Click, choose All Tasks, and then Import. On the first page of the Certificate Import Wizard, ensure Store Location is 'Local Machine' and hit next
- Select the File name of the certificate to import, and hit Next
- On the Certificate Storage, page ensure it is selected to 'Place all certificate in the following store', and Certificate Store: Personal.
- On the 'Completing the Certificate Import Wizard' page hit 'Finish' - you should now see the freshly imported certificate listed (as in above image)
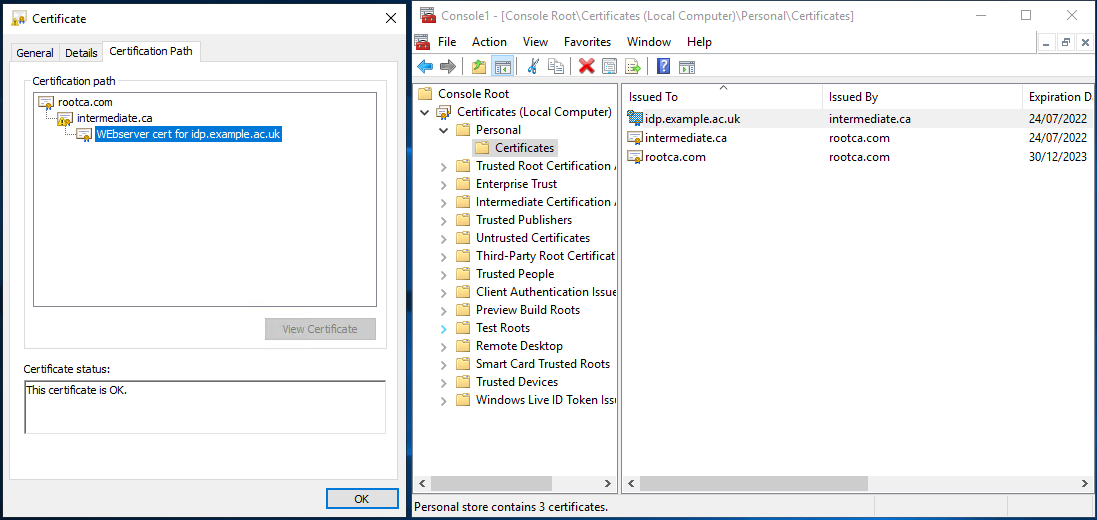
- From within CertManager, open your certificate, it should state that 'You have a private key that corresponds to this certificate'
- select the 'Certification Path' tab - you will need to export all the listed certificates listed in the hierarchy (they should all be present under personal certificates)
- Back in CertManager/personal select all the certificates in the hierarchy, choose 'All Tasks' and 'Export'
- On the Certificate Export Wizard, Choose 'Next'.
- Export Private Key, Choose 'Yes, export the private key'
- Export File Format, should now have chosen 'Personal Information Exchange - PKCS #12 (.PFX), ensure that 'Export all extended properties' are chosen, and choose Next
- Under 'Security', choose 'Password'. This password will need to match the password in
C:\Program Files(x86)\Shibboleth\IdP\jetty-base\start.d\idp.ini, fieldjetty.sslContext.keyStorePasswordso set it and/or change the stored password as appropriate (the curly brackets in the default password are part of the password):
jetty.sslContext.keyStorePassword=superStrongPassword1
- Under File to Export, Select the file, navigate to
C:\Program Files(x86)\Shibboleth\IdP\credentialsand choose 'Save as Type', and 'All Files (*.*)', enter a suitable filename e.g.idp.example.ac.uk.pfxand Click Next - Completing the certificate Export Wizard, Click Finish, and on you should have a dialogue to say that 'The Export was successful'
- Check: in a command prompt, run
keytool -list -v -keystore idp.example.ac.uk.pfx -storetype PKCS12
(enter password from above) - this should list the contained certificates (in a not very readable way)